
Creating a Sitecore Connect Push Webhook Recipe to Sitecore AI
In this blog post, we will explore how to create a powerful Sitecore Connect Webhook triggered Recipe to integrate with Sitecore AI. The recipe focuses on importing data items under an item bucket for authoring use. The integration allows you to push data from your 3rd party source directly into Sitecore AI for enhanced content generation capabilities. A demo video showing the entire process in action can be found at the end of this guide.
Sitecore Connect provides a flexible way to connect various data sources and services, making it easier to leverage the power of Sitecore AI with Connect recipes, formulas, and community tooling apps. The underlying Workato engine facilitates a truly robust canvas.
Prerequisites
Before we begin, ensure you have the following prerequisites in place:
- A Sitecore AI instance with API access.
- A 3rd party system capable of sending webhook requests. In this example, we will use Postman to simulate the webhook sender.
- A Sitecore Connect instance
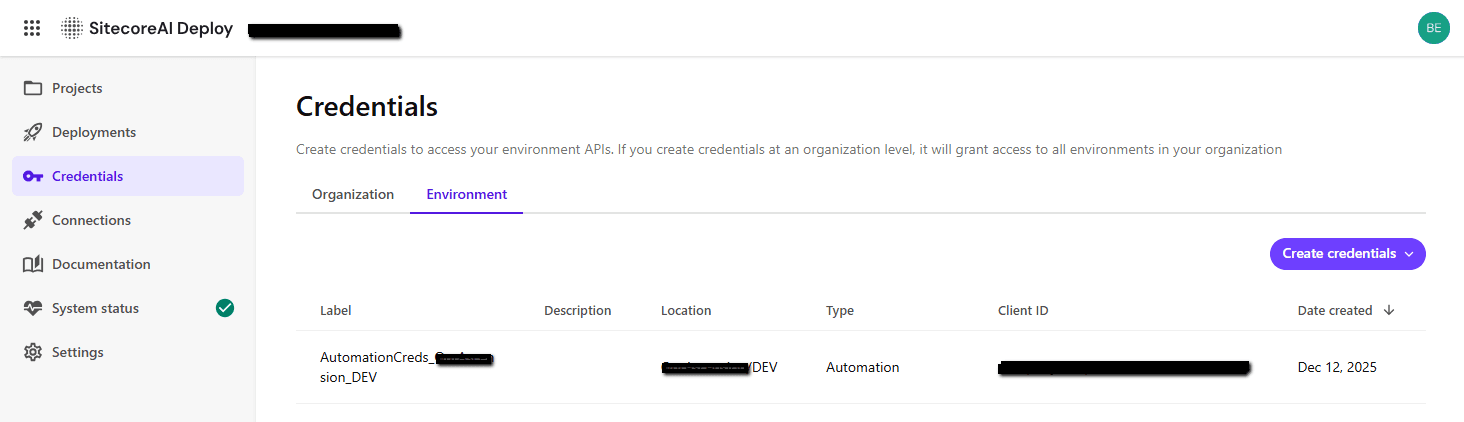
First, Enable Automation Credentials from Sitecore Deploy
To create a connection to Sitecore AI in Sitecore Connect, you first need to ensure that you have the necessary API credentials to authenticate your requests. Follow these steps to enable the Sitecore Deploy API credentials:
- Log in to your Sitecore Deploy instance
- Navigate to the "Credentials" section
- Select the "Environment" tab grouping and select "Create credentials" > "Automation"
- Set the Label field with your environment prefix, such as
AutomationCreds_YourProject_DEV - Select your Project and Environment from the dropdowns
Creating the Connection in Sitecore Connect
Head over to https://connect.sitecorecloud.io/ and log in with your Sitecore credentials. Once logged in, follow these steps to create a new connection to Sitecore AI:
- Select the "Projects" tab in header navigation
- In the left sidebar, select "Connections"
- Click the "Create" button > "Connection"
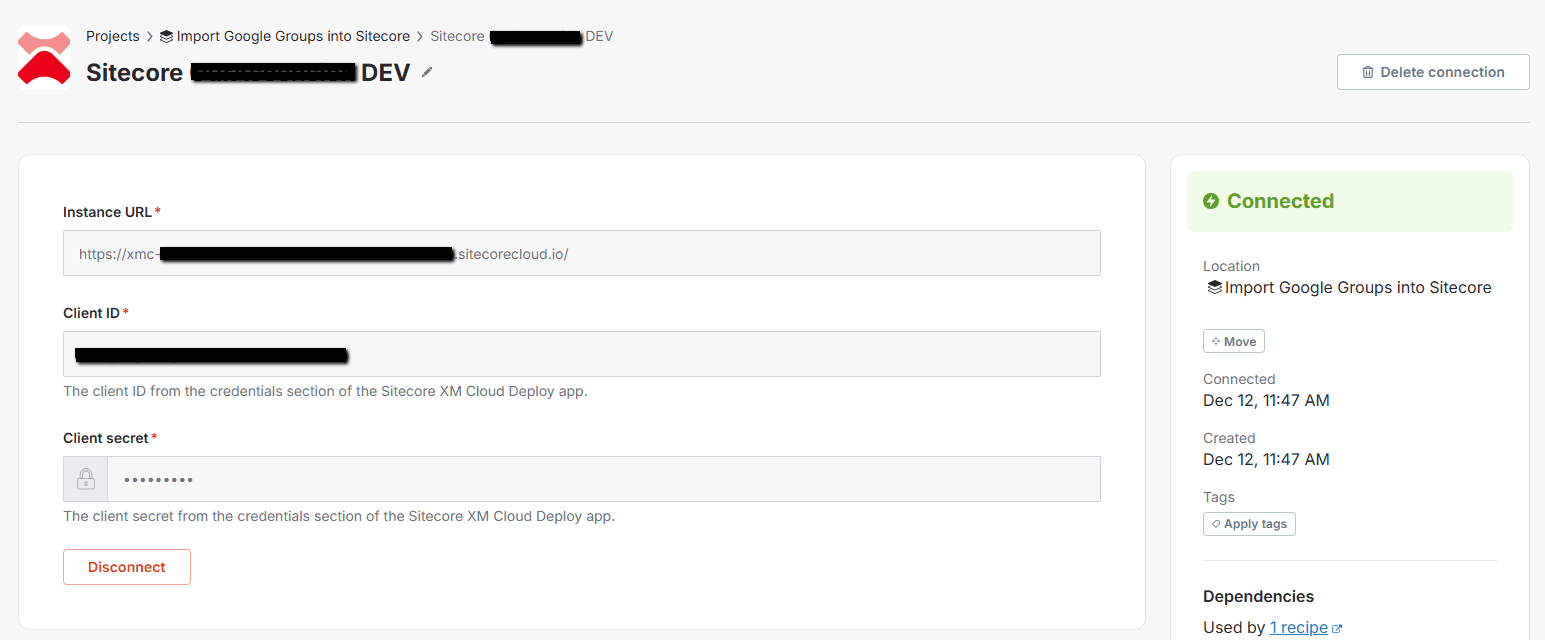
- Search for "Sitecore" and select "Sitecore XM Cloud" (do note that this app has yet been renamed to Sitecore AI in Connect)
- Fill in the connection details. You'll also want to create a new project from the "Project dropdown". I've provided a screenshot below for reference:
Creating the Recipe
Recipes in Sitecore Connect allow you to define how data flows between your source and destination systems. To set up a recipe for pushing data to Sitecore AI, follow these steps:
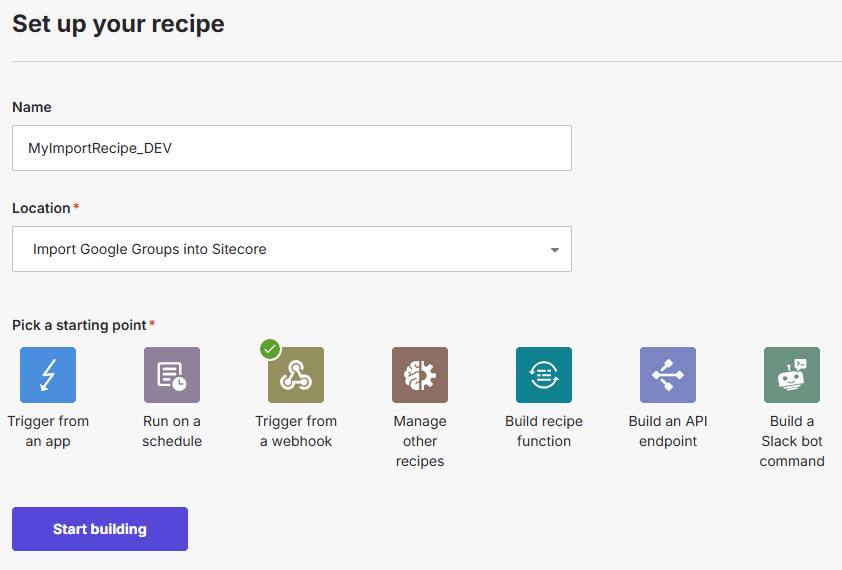
- In your Sitecore Connect project, click "Create" > "Recipe"
- Choose "Trigger from a webhook" as the source type
- Select "Start building"
Setting up the Recipe
Under our project recipe, we should now see a semi-blank canvas to start building our recipe. The canvas should already have a "Webhook Trigger" node added for us. This node will generate a unique webhook URL that we can use to send data direectly to Sitecore Connect!
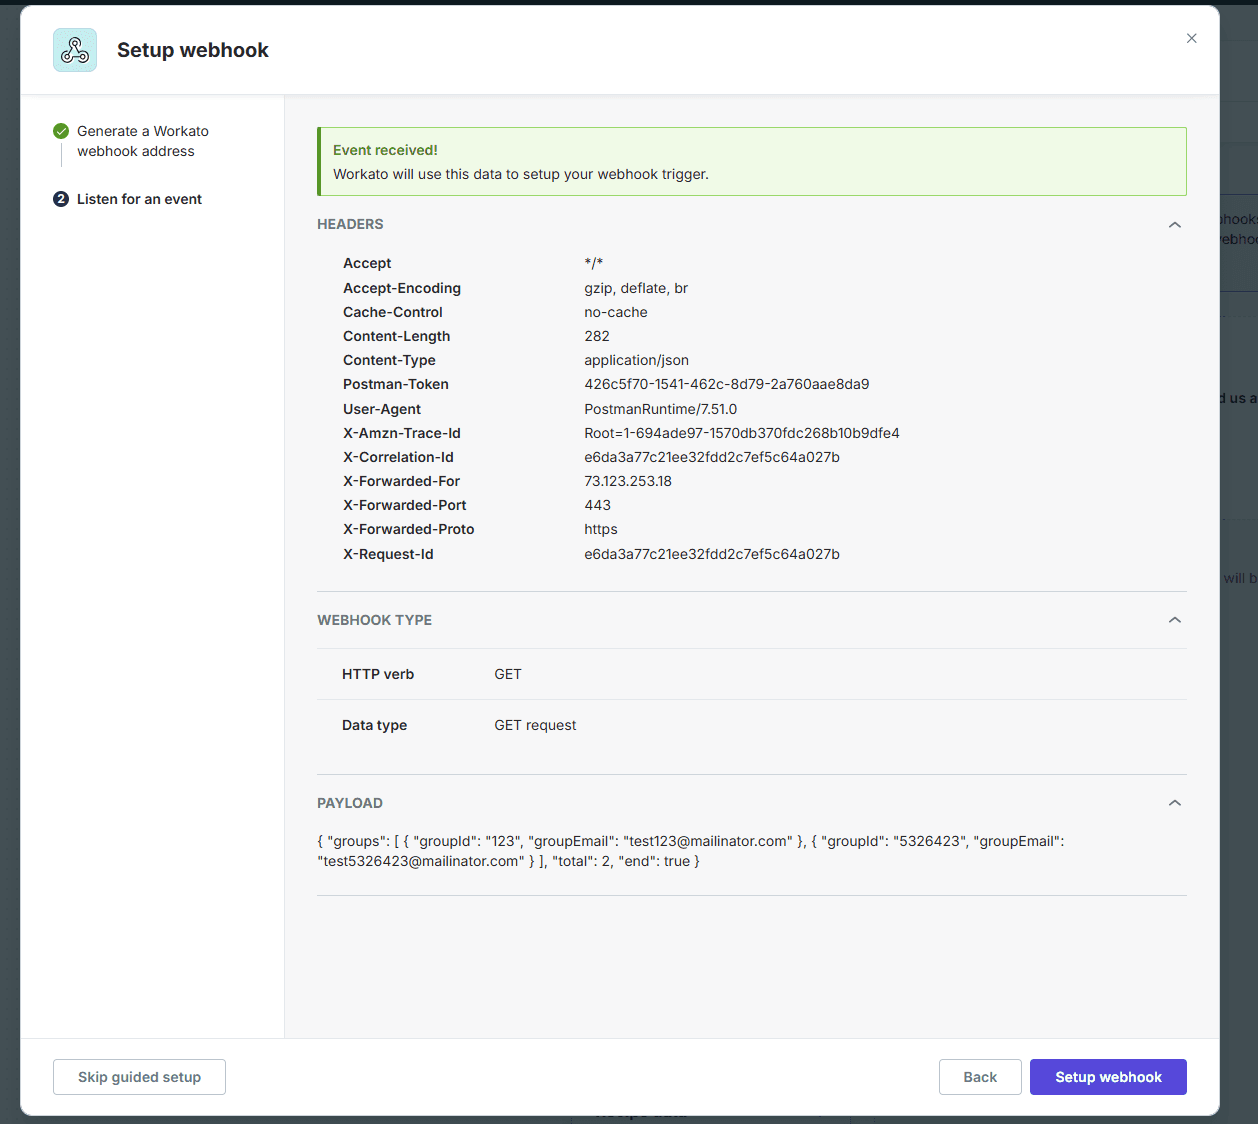
Click on the "Webhook Trigger" node to view its details. You'll notice that it hasn't been set up yet, so click on the "Start guided setup" button. Within the Setup wizard, provid an event name, such as import-yourjob-data, copy the "Workato webhook address", then and click "Next". The setup guide will start listening for an incoming webhook request.
Open postman and set up a simple GET request to the webhook URL you copied earlier. Send the request, and you should see Sitecore Connect receive the webhook payload. For my example, I am sending a simple JSON payload with a groups array to mimic the data that I know will be pushed:
{
  "groups": [
    {
      "groupId": "123",
      "groupEmail": "[email protected]"
    },
    {
      "groupId": "456",
      "groupEmail": "[email protected]"
    }
  ],
  "total": 2,
  "end": true
}
After clicking "Send" in Postman you'll receive a response status OK, then return to Sitecore Connect. You should see that the webhook trigger has successfully received the payload and automatically maps the webhook type and data structure for us:
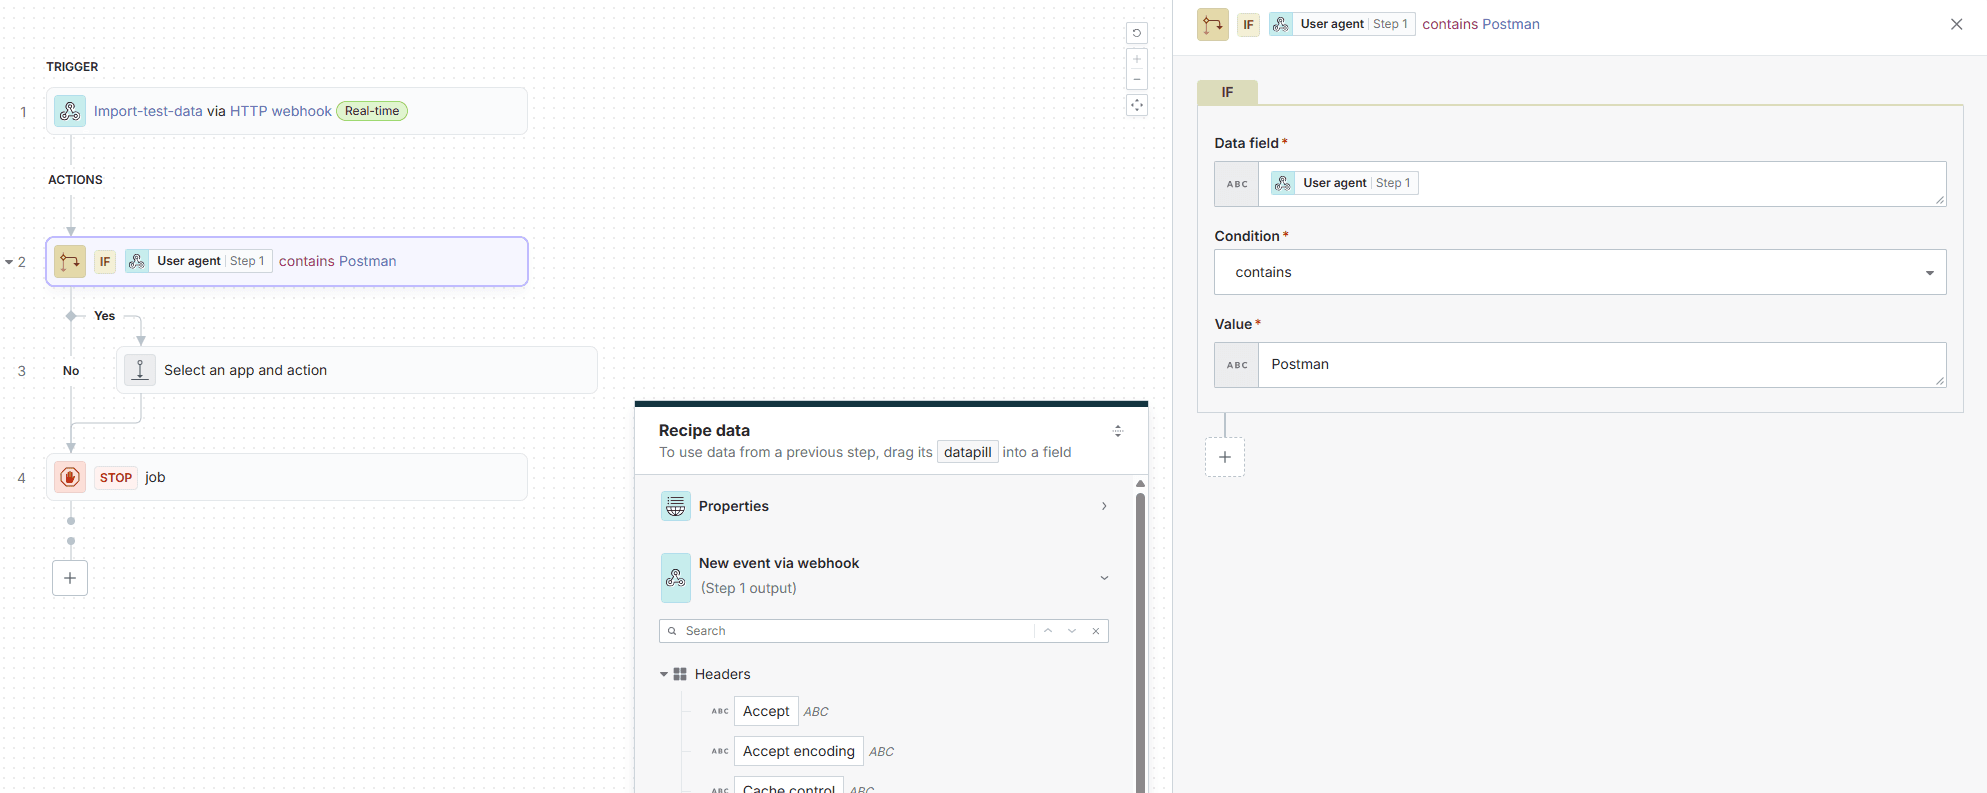
Let's add a new action to our recipe following the trigger. Click the "+" button below the webhook trigger node and select "+ add action". In the action bar, select "IF condition". We can use conditionals to filter out noise using previous "recipe data". For our example, we will check if the user-agent request header field in the webhook payload contains "Postman". If it is, we will proceed to push the data to Sitecore AI:
Next, we need to iterate over the groups array in our webhook payload to push each group item to Sitecore AI. Since we will be working directly with the Sitecore AI Authoring Management API, that GraphQL handles a single item at a time, which means we need to add a "For each" step under the "IF condition" node, before adding an actual "action". The step to add is called the "Repeat for each" action. Configure the "Repeat for each" action to iterate over the groups array from the webhook payload via the "Input list" field. Sitecore Connect is fancy enough to let us select the array directly from the webhook data structure:

Now that we're in the context of a single group item from the groups array, we can add the action to push the data to Sitecore AI. Click the "+" button within the "Repeat for each" node and select "+ Action in app". In the action bar, you should already see "Sitecore XM Cloud" under the "Your Connected Apps" section. Select that app, then choose "Custom Action". You can also explore the built-in actions available, but those options are very limited and doesn't give control over setting up the actual GraphQL query with the correct mutation.
In the "Custom Action" guided setup window, set the "Method" to POST. Set the "Path" to sitecore/api/authoring/graphql/v1. Then, in the "Request body" field, we will construct our GraphQL mutation to create a new data item under an item bucket in Sitecore AI. My example mutation below creates a new item with the groupId and groupEmail fields, but it's specifically formatted to work within the confounds of Workato's field syntax, which includes "data pill" references to pull in dynamic data from the webhook payload AND a Workato formula (Ruby function) to replace the "@" symbol in the email field with "at" since Sitecore item names cannot contain special characters:
mutation { createItem( input: { name: '#{_dp('{"pill_type":"output","provider":"foreach","line":"d75a151a","path":["groupEmail"]}')}.gsub("@", "_at_")' itemplateId: "{88AC9B81-E232-4B82-A49A-0A4283282A8D}" parent: "{F2AC542C-FCFB-44B2-96FF-A4D6F894C5BE}" language: "en" fields: [ { name: "identifier", value: "#{_dp('{"pill_type":"output","provider":"foreach","line":"d75a151a","path":["groupId"]}')}" } { name: "email", value: "#{_dp('{"pill_type":"output","provider":"foreach","line":"d75a151a","path":["groupEmail"]}')}" } ] } ) { item { itemId name path fields(ownFields: true, excludeStandardFields: true) { nodes { name value } } } }}
Once you paste that into the Query field, you'll notice that the actual viewing value gets updated with Workato data pills and formula syntax. This part was a bit tricky to get right, and honestly I don't really like how this looks, so let's take a step back and see what else we can try. Keep this action saved for now as we'll revisit it in a moment.
Fixing the Variable Interpolation
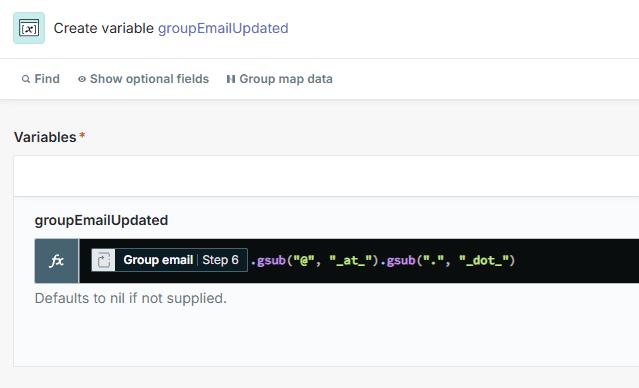
Before the GraphQL Create Item action, create a new action called "Create Variable" - an OOTB action created by Workato to store temporary data in our current scope. Create a new variable called groupEmailUpdated and set its value to the existing recipe data from the foreach loop that we're in, "Group email", then after that data pill is added, add a period and use the gsub function to replace "@" with "at". The final formula should look like this:
=_dp('{"pill_type":"output","provider":"foreach","line":"d75a151a","path":["groupEmail"]}').gsub("@", "_at_").gsub(".", "_dot_")
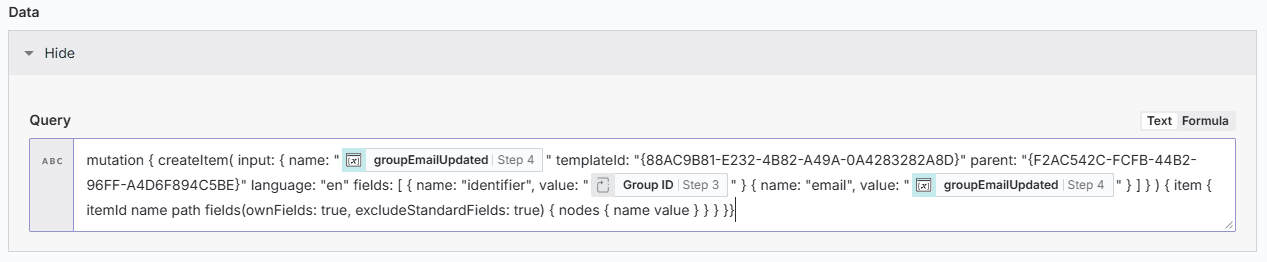
Now, return to the GraphQL Create Item action and update the mutation query to use the new variable instead of trying to do the formula directly in the query. The updated mutation should look a lot cleaner and only show data pills:
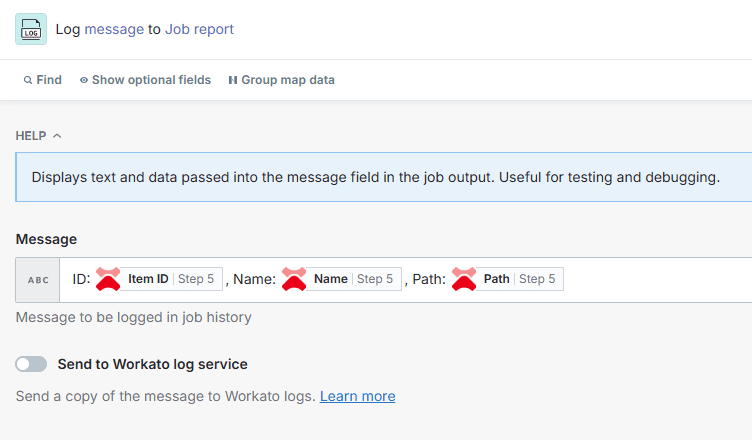
I've also gone ahead and added another action called "Log message" after the GraphQL action to log the response from Sitecore AI for debugging purposes. This is optional but can be helpful to see detailed information in the actual Job report after running the recipe:
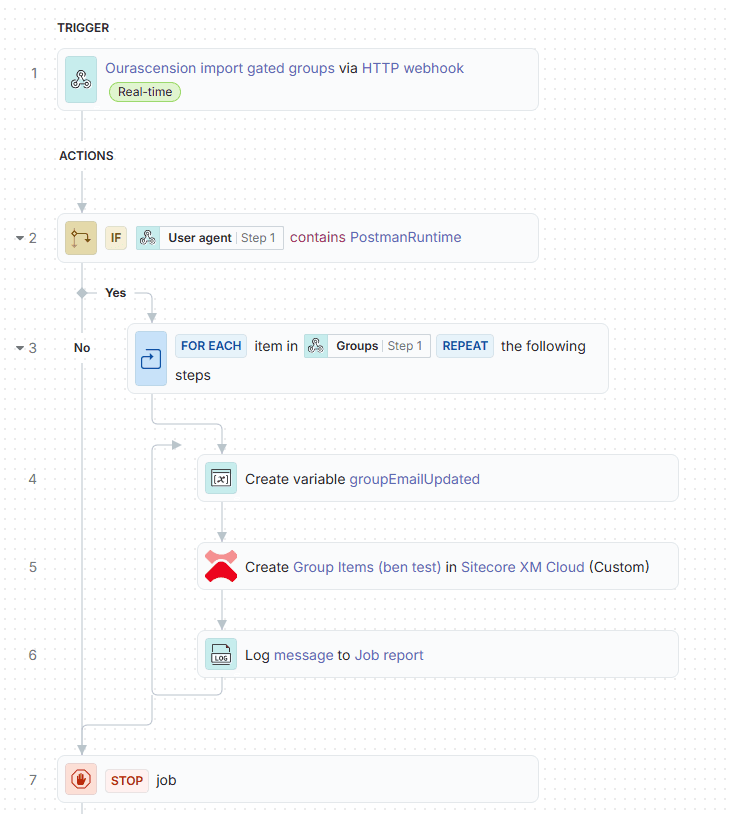
Our recipe is now complete! Don't forget to hit save. It should look something like this:
Demo Time!
With everything set up, it's time to test our recipe, and to be exact, version 35 of our recipe 😌
Start the recipe by clicking the "Start" button in the top-right corner. Once the recipe is running, head back to Postman and send the same webhook payload as before to the Workato webhook URL. See the video below for a quick demo of the entire process:
Troubleshooting GraphQL Syntax Issues
- Do not switch the Data field over to the "Formula" tab, as this will break the GraphQL syntax and cause errors when trying to save the recipe. Sitecore support mentioned that when using the Formula mode, Workato checks the input data according to Ruby's standards, which can cause the GraphQL query to fail on save. To resolve this, you can use the "Text" format instead of "Formula." The "Text" format bypasses Ruby validation, allowing the recipe to pass where the "Formula" format failed.
- If you must add Workato Formula's directly into the Query text field, your options are limited. Use Ruby's string interpolation syntax
#{}to embed formulas within the GraphQL query, e.g.,:%Q{mutation { createItem( input: { name: "#{"[email protected]".gsub("@", "_at_")}" ... } ) }}.